Showing posts with label packaging. Show all posts

Jul 1, 2012

What I Made | Summer 2012 Gift Exchange with Craftaholics Anonymous

Have you heard of Linda from Craftaholics Anonymous?! I'm sure you have, but if not, you should get to know her! Not only is she super crafty and the owner of a to-die-for craft room, but twice a year she holds a handmade gift exchange, one in the summer and the other right before Christmas. This is my 3rd exchange, and I'm never disappointed! The basics are, you sign up, draw a name and make that person a gift. Someone draws your name, and they make you a gift. Easy peasy, right?!
If you missed out on this one, go over and sign up to get a reminder for the Winter exchange; which starts November 1st. Go ahead and check out the photo's of all the fun gifts made this time around over in the Flickr group and at Linda's link party. I'm beyond positive you'll find some great inspiration from other craft lovers! Plus, it's never too early to start thinking about those Christmas presents ;)

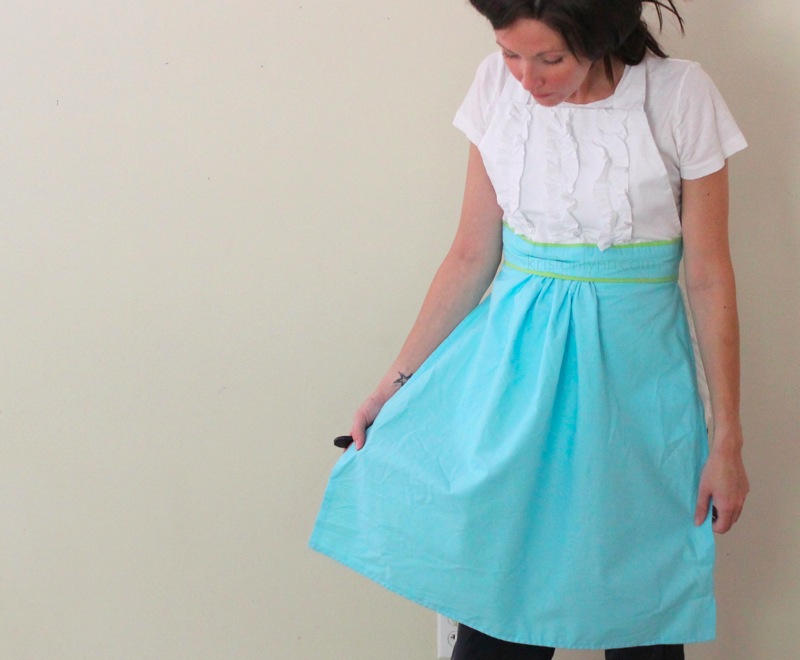
My giftee turned out to be Courtney, a SAHM of two, who lives 2,500 miles away in the beautiful state of Washington. After stalking her Elfster likes and Pinterest account, I knew what I wanted to make her. An apron; she had a few pinned and liked, and I figured an Anthropologie Tea & Crumpets apron knock-off would be perfect!

Tutorial for apron by Kelly @ Sewing in No Mans Land

Of course I wanted something to go with the apron, and what better item to accompany an apron than a recipe book?

May 21, 2012

Packaging Handmade Products - The Etsy Shop + Printable DIY Envelope

There's been a lot going on in the shop lately. Changing the way a few things are done, including adding direct checkout so you can pay by credit card without having to use PayPal. I've been building up stock and re-organizing how I store all of that stock.  I've also been finishing up and listing cards that have been just sitting as drafts (like this awesome Mason Jar Thank You or this WINE Birthday Card!), and it feels good. A dozen new cards have been added these past few weeks, and I still have a dozen more that need to be finalized and photographed.

The biggest change I've made (and the reason behind this post, other than a bit of self-promoting... hah) is the way my cards are packaged to ship. I've been really wanting to add more of a personal and handmade touch to my packaging, while cutting down the cost. I know $1 may seem like a lot to pay for the shipping of a card, but truth be told, it costs me more than that. So after playing with a ton of ideas, I've settled on repurposing old Kroger brown bags into mailers to save some money... and some trees. WIN-WIN.


What's inside the package:

I have a checklist for each order which is something like this:


Of course the cards ordered, then:
  • Handwritten note (on recycled cardboard- old cereal boxes- to keep cards from bending in mail)
  • Fun confetti recycled out of paint chips
  • a few fun little extras (I can't giveaway all my secrets ::wink.wink::)
  • Business Card
  • Twine or Stamped kraft sleeve/bag

Where does all that stuff go??


The cards and extra goodies all get put inside a recycled mailer in which I designed and print onto the Kroger bags.


Stamp c/o Baby Jewels 

 
Want to make your own recycled mailers??
 
What you need:
  • Paper grocery bags
  • Scissors & Pen
  • 8.5" x 11" piece of cardstock (to trace)
  • downloadable PDF template from The Etsy Blog
  • Printer w/ ink

Let's get to it:
  1. Cut the seam on the back of the Kroger bag, and then cut out the bottom. You will be left with a flat piece of kraft paper.
  2. Take a piece of 8.5" x 11" piece of card stock and trace it onto the now flat bag. Then cut them out. You should be able to get 4 pieces out of 1 bag (possibly 5 if you can carefully open the bottom flaps)
  3. Stack the new pieces of recycled kraft paper and press, by placing some heavy books on top. This will help flatten them out and keep them from getting jammed up in your printer.
  4. Download this printable template or make your own.
  5. Print your design onto your recycled kraft paper and cut out.
  6. Fold flaps, place your goodies in and tape up. =)

NOTE: You can thank Danielle on the Etsy blog for inspiring me to create new mailers. If you go check out this post written by her back in 2008, I'm sure you'll find inspiration too. If you scroll to the bottom of her post, she provides a link in which you can download a fun mailer which you can print and use.
 
I used the download as a template but re-designed most everything on the front of the envelope to better fit my style. I decided I wanted keep the back of the envelope blank so I could use my pretty stamp, but kept the "thank you" and the "recycle this envelope" on the flap, because they were already perfect.

As far as addressing the envelope, I usually just copy and paste right from the Etsy order to Illustrator and print off each mailer as orders come in ( I HATE MY HANDWRITING! which may be why I'm so obsessed with pretty fonts).


Photo originally from this WIW post.

Craig is always complaining about how long it takes me to get orders out. And I totally know that I could pump them out twice as fast as I actually do, but then I wouldn't be able to add all of these little touches. And it's these little touches that make my customers feel special, which makes me happy. (And to be honest, it really doesn't take all that long!)

I'm not saying you have to go all out and add a million little things to your packaging, because lets be real... your customer is buying from you because they like what you are selling. BUT  just think about how ecstatic they would be with a little surprise in there? A big part of selling handmade is word of mouth. A happy customer might tell their friends about you, but an ecstatic customer will shout your name from the rooftops. We want ecstatic customers, and adding these little touches will surely help you get your customer there. Even if it's just something as simple as a homemade mailer.


What are your favorite way to package your items?? What kind of packaging has been your favorite to receive?


xo


***********************************************
little bird bands
I'd like to introduce a new sponsor Little Bird Bands. It's a shop full of handmade baby accessories. She makes the cutest stuff for littles and takes custom orders! Be sure to check out her FB page too. You can order right from her shop, or contact her on FB to create a custom accessory for your little.

***********************************************

If you feel like I've missed something or need to add anything, please don't hesitate to email me so I can update! Thanks for being you! You all rock my world, daily!

Dec 13, 2011

burlap, lace, tweed OH MY | packaging bows | a tutorial

bow tutorial

burlap bow

Why buy store-bought bows when you can make the prettiest ones ever? It adds such a nice handmade touch to even store bought presents. AND they are reusable! I seen this post by Jessica and had a light bulb moment!

Material:

    • Any fabric, ribbon, or even paper
      • I used Burlap, ribbon lace and tweed.
    • Stapler
    • Needle/Thread
    • Wall mounting tape.

First you want to cut your strips. You will have 3 Large, 3 Medium, 2 Small and 1 xSmall. Just decrease the length of each size by one inch and the last one by 2 inches.

For example,

    • Large = 10”
    • Medium = 9 “
    • Small = 8”.
    • xSmall = 6”

I didn’t measure the width, just eyeballed it, but I’d say to keep it around 1/2” to 3/4”
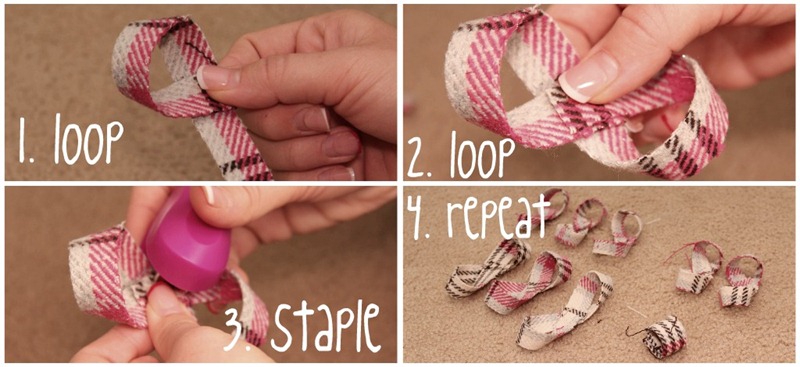
make a bow

You are basically making a figure eight and securing in the center. Try to make them “skinny” eights rather than “fat” eights. That probably makes NO sense, but as you make them, you’ll see. The “skinny” eights are more pointy on the ends, therefore, looking more like the store-bought bows. (unlike the round ones pictured)

Once you have your 9 strips looped and secured, start stacking one ontop of the other. Start with the Large, ending with the circle in the center. To secure, just throw a couple stitches in the center. You could use hot glue, but I promise… the stitches will hold better, and seems more intimidating than it is.

stitch

Take the wall mounting tape (I used 3M), peel one off, hot glue the sticky part and press onto the center bottom.
Note: You can just hot glue them onto your package, I used the tape because I gave a dozen of these as a gift.

stick 

That’s it. See, super fast and easy, too!

bows

I’m in love with them. ESPECIALLY the lace! Lace bows = Happy heart!

I made these ones out of fabric and they are just as pretty:

bows

And Adelyn HAD to have one for her hair, so I put one on an alligator clip:

adelyn bow

Have fun! Play with different patterns and textures. Group different textures together on one present to make it extra special.

(If you notice the gift receiver tossing the bow into the wrapping paper trash, don’t hesitate, or feel bad, asking for it back. They are too pretty to throw away! hah)

Happy Holidays!!!

# kristanlynn
xoxo  

This post was sponsored by Heather @ JustLove.lyThings.

bloglovin