Nov 27, 2012

DIY Keepsake Ornaments | a Christmas Gift


I have been planning these ornaments for awhile now. As Adelyn and I were searching for sea shells on our vacation, I envisioned them. And they turned out just as I imagined.

What you need:
clear glass bulb (Michael's or any craft store)
photo
sand and sea shells (optional)
twine or ribbon (optional)
any other embellishment you can think of.

How I made them:
I started out by using this tutorial to print mini poloroids.

THEN:
I poured a little sand into the glass bulb and added some tiny sea shells. (which we had saved from Siesta Key beach)
Gently roll the photo (like you would a treasure map) and insert into the bulb. 
Use tweezers to maneuver everything how you want it. I also used the end of a skinny paint brush to help move and flip things.
Add fabric or washi tape (in my case fabric tape) around the top and you're done.
It really is that easy! And it's the perfect Holiday gift for close friends and relative.

For the second ornament pictured, I just placed the photo into the bulb, and pushed a long string of jute inside using tweezer to manipulate it where I wanted.


If you wanted to display them all year, just place a cork in the top. I wrapped my cork with fabric tape, because it was a tad too small, after adding the tape it fit perfectly. You can glue a little washer on the bottom, which will keep it standing upright, or take a Frappuccino cap, wrap with fabric and set it in there (like pictured).

I hope you feel inspired to make your own special keepsake ornament! The possibilities are endless and you can really use anything that you can fit into the bulb.
I would love to see them if you make any, so feel free to share on Facebook.

Linked up with Kimmie over @ Sugar and Dots What I Whipped Up Wednesdays.

Sep 27, 2012

A Cupple with Sparkling Cider | Recipe

cup·ple  [kuhp-uhl] noun: a cup made out of an apple.


These are so easy to make, and would add such a cute touch to any fall festivity you have planned!

To make the apple cup:  Cut off the top of an apple. Use a melon baller to scoop out the inside, leaving about a 1/4" around the edge. Rub the edges with lemon juice to prevent the apple from browning
Easy peasy.

Sparkling Cider Recipe: 1 part cider. 1 part cranberry juice. 1 part sparkling water.

Add a cinnamon stick and VOILA!

*The cinnamon stick is pretty important, as it adds to the flavor of the sparkling cider. If you don't have enough for each cupple, just add them straight into the pitcher.


Adelyn drank hers out of the cinnamon stick and wanted seconds and thirds!

Also, while trying to bring a touch of Michigan cider mills to TN, we made some mini caramel apples. Thanks to a pin I saw on Pinterest.


Just a grape dipped into caramel rolled into nuts.

Jul 20, 2012

a sewing pouch tutorial | vintage inspired

So remember a few weeks ago, I posted about the gift I sent to my giftee for the Handmade Gift Exchange?? Well... I have a secret: I really love making things! OH, not a secret?? OK. Well, I  especially love making things if it's a surprise gift for someone. Like, really really enjoy it.
So I contacted Linda and let her know that if anyone backed out or couldn't fulfill their gifter duties, I would be happy to step in and make another little something. Sure enough, Linda contacted me moments after my message was sent and needed help. YIPPEEE!
This giftee mentioned how much she loved to hand quilt and embroider... so... here is the gift I made her:


A little sewing pouch. There's a place to hold all your pins, needles and safety pins, and a pouch for scissors and thread and whatever else you need to keep on hand.


My inspiration for this project came from my best blog friend (and first Gift Exchange partner), Andrea. She rocks at embroidery! I remembered this post Andrea had written about a little sewing clutch she stitched up and knew it was what I wanted to make.
And I did... but, some how, after sewing it all, turning it inside out and top stitching, It looked like a 5 year old made it! Everything was slanted to the right and basically it just SUCKED! Nothing like Andrea's stellar Gettin' Stitchy Wit It clutch. So I took her basic idea, and made something similar.


Then packaged it up with a few of my cards and some twine and gift tags made out of vintage inspired paper.


After sending off this little beauty,  I felt sad and wanted one of my own. So I made one for myself. Good thing, because I documented the basic process this time around and can now share with you how to make a vintage inspired sewing pouch of your very own.


What you'll need:
Outter Fabric
Inner Fabric
Felt
Scrap fabric- for pouches and appliqué
Lace, button, cord and any other trimmings.


Start by cutting your fabric.
Outter fabric- 17" x 7"
Inner Fabric- 17" x 7"
Pouch- 5" x 7"
Pin holder- 4.5" x 7"
Felt- 2" x 7 "


After you have your fabric cut, hem the top of your pouch. Then sew the fabric that will hold your felt by folding it in half, right sides together and sewing the long sides together using 1/4" seam. Turn inside out and insert your piece of felt.


Lay out all your pieces and start pinning into place. As shown.


You can play with your scrap pieces and other trimmings to see where you want them on your outer fabric. I did this by folding the outer piece into thirds and using that as a guide. Once you get everything looking the way you like, pin it into place. (Note that there will be a 1/4" seem allowance after sewing it together)


Head back over to the sewing machine and start stitching/appliquéing  everything into place. You may have to take out some pins and move things around to get each piece of scrap stitched properly. I used a decorative stitch, but any stitch would work.
Add your button. 


For the inner fabric, you will pin your hemmed pouch on the bottom, and your pin holder (felt inside) in the direct center. Be sure to stitch down any other trimmings you'd like.
Stitch down the top of the pin holder.
If you'd like to keep your scissors and threads separate in the pouch, go ahead and mark where you'd like the scissor pouch to be and stitch down that line. (You do not need to sew up the sides of your pouch, as it will be stitched when we attach the outer and inner fabric)


Once everything that needs to be stitched is done and the pouch is pinned, attach the cord to the top of the outer fabric, taking note of where the button is. 


Next, place the outer and inner fabric right sides together and pin. Using a 1/4" seam allowance, sew the two pieces together... leaving the top open and unstitched for turning. 


Turn inside out and top stitch all the way around, closing up the turn opening. 
Thats it!


Close ups:


What do you think? It came in handy the other night while I was embroidering this announcement! I'm in love.


If you make one, I'd love to see photo's of what you come up with! If you are confused on any steps or feel like I've left a step out, please email me!!!


Go be crafty and make something ;)

Jul 2, 2012

Business Card Display | DIY

My business cards just lay on my desk, and half of them end up getting scattered and lost. I've been wanting to make a holder for them for everrrr, and yesterday I finally did!


What I used:
Altoids tin, some lace, twine, a few strips of washi tape for decorating the  outside and making the mini bunting.
(The washi with the writing "love it - want it" is actually from the SMASH line. I got it on sale for $1 at Target!)

It was super fast and easy to whip up, using only tape! That's the fun with decorating with washi, there's no cutting or gluing, just rip and place. 
To adhere the lace, I covered the inner-top with washi tape- then covered that washi with strips of double sided tape. Lay on the strips of lace (starting at the bottom), press firmly and there you have it.
The bunting is just a piece of twine with strips of washi folded over, then cut into shapes.


It's perfect, because I need my cards out and easy to access daily, since I add them to all of the orders from the shop. It's more of a display than a holder, which will be great at all those indie craft shows I plan on attending (::sigh:: one day).


Altoids tins are GREAT for repurposing projects! Check out my Pinterest board full of fun inspiration. My favorite pin so far is this Travel Painting Kit! Just a NOTE: I'm not the first person to think of using an Altoids tin as a business card holder, I've been seeing them everywhere... but they're not a new idea either... just check out creativeKISMET's holder from over 3 years ago!


I'm totally loving the new kraft business cards and just as happy with the little quotes on the back of each card (except for the missing E at the end of Shakespeare... which I photoshopped in so I wasn't bombarded with emails... ya win some, ya lose some. hah)


What do you think?
What's your favorite way to repurpose an Altoids tin?

Jul 1, 2012

What I Made | Summer 2012 Gift Exchange with Craftaholics Anonymous

Have you heard of Linda from Craftaholics Anonymous?! I'm sure you have, but if not, you should get to know her! Not only is she super crafty and the owner of a to-die-for craft room, but twice a year she holds a handmade gift exchange, one in the summer and the other right before Christmas. This is my 3rd exchange, and I'm never disappointed! The basics are, you sign up, draw a name and make that person a gift. Someone draws your name, and they make you a gift. Easy peasy, right?!
If you missed out on this one, go over and sign up to get a reminder for the Winter exchange; which starts November 1st. Go ahead and check out the photo's of all the fun gifts made this time around over in the Flickr group and at Linda's link party. I'm beyond positive you'll find some great inspiration from other craft lovers! Plus, it's never too early to start thinking about those Christmas presents ;)

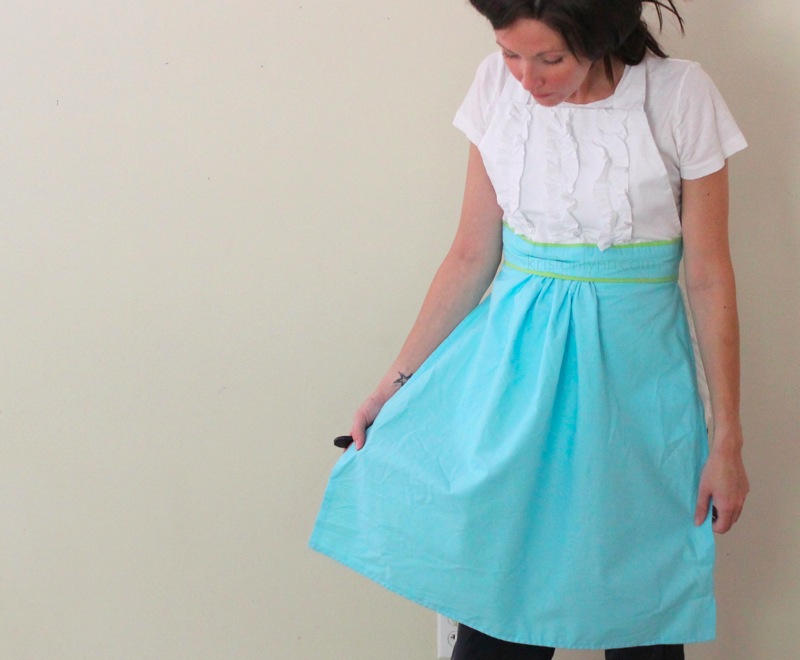
My giftee turned out to be Courtney, a SAHM of two, who lives 2,500 miles away in the beautiful state of Washington. After stalking her Elfster likes and Pinterest account, I knew what I wanted to make her. An apron; she had a few pinned and liked, and I figured an Anthropologie Tea & Crumpets apron knock-off would be perfect!

Tutorial for apron by Kelly @ Sewing in No Mans Land

Of course I wanted something to go with the apron, and what better item to accompany an apron than a recipe book?

May 31, 2012

Homemade Lemonade- Pomegranate Lemonade | fresh squeezed lemonade with a touch of spearmint

Summer is upon us and Adelyn knows this. Her new thing is announcing it's SUMMERTIME followed by some sort of summer activity we HAVE to do. I'm not sure how she became obsessed with lemonade, but she insists on the fact it's a summertime drink and she needs to have it. Because, ya know... it's summertime.


So after looking at dozens of homemade lemonade recipes online, and them pretty much all being the same, I decided to just learn as I go... lemon, water and sugar.. how hard could it be? 

I opted for a pink lemonade, made with pomegranate juice instead of the normal cranberry. YUM!  If you'd like to jut keep it plain, just leave out the pomegranate juice.

Ingredients:
  • 2 Cups Fresh Lemon Juice (10-12 normal sized lemons)
  • 2 Cups Sugar (1 1/2 Cup if you'd like it less sweet)
  • 8 Cups Water
  • 1/2 C Pomegranate Juice
  • Handful of fresh spearmint leaves.

Let's quench your thirst!

1. To make your sweetening syrup, bring your sugar and 2 Cups of water to a boil in saucepan. Set aside and let cool.
2. Juice your lemons, it took 10 lemons for me to get 2 Cups of juice.


3. Mix your fresh lemon juice with remaining 6 Cups of water into pitcher. Add pomegranate juice (if you don't want pink lemonade, leave.
4. Slice 2 or 3 lemons thinly and add to juice mix.


5. Once your syrup has cooled, add it to the pitcher.

6. For the spearmint accent you'll want to fill your ice cube trays with your lemonade, push 2 leaves into each filled tray. 


Freeze. Add to filled glasses prior to serving.


The reason I didn't add the spearmint directly into the pitcher was simply because I knew it would not be gone in one day. I didn't want gross soggy spearmint in my lemonade the following day. If you plan on serving at a party or BBQ, you could add the spearmint directly to your pitcher.


I hope you love it. Craig says it's a bit on the sweet side, while I think it's a perfect mix of sweet and sour. And I love the minty twist!!!

xo


May 23, 2012

DIY Mason Jar Tumbler Lid- In ONLY 3 Steps

I've been dying to get some of these tumbler lids since I saw them on Groopdealz May 3rd. After missing out on snatching up the deal, then shopping around the internet for them, I was discouraged, because they are ridiculously expensive!!! AND I couldn't find a tutorial on how the heck they were made. I knew they could be made on the cheap, just needed to figure out what that darn seal was!

Materials Needed:
Mason jar lid
Seal or Grommet
Drill and 3/8" drill bit
Wire cutter
How to do it:

1. Keep the lid on the mason jar, use the drill bit to drill a hole wherever you want.
2. You'll most likely have rough edges, so use the wire cutters to snip off any edges sticking out and try to make the hole as flat as possible.
3. Press, pinch and push the seal into the hole, carefully.

VOILA! You're done.

Just make sure you wash the mason jar and lid good to get rid of any debris.
TIP: Use the same jar, just new lids while making holes.
Now I have to be honest, if it wasn't for the guys at Lowes, I would have never figured this out on my own, so really all credit for this post goes to them! I figured I could use a drill bit for the hole, but I was lost when it came to what type of seal was being used. After rambling on about what I was looking for, I finally found the email to show them what I wanted to make. I kind of felt stupid when they had a "duh" look on their face and lead me right to the type of seals I needed. You can see them here.  They were in those little drawers that line the wall where you walk in (at least in ours)... I swear the sign above them said Automotive Parts, but looking at the part number online it looks like they are an electrical supply.

So after the Lowe's man helped me pick out the size, I then had to put my pride aside and ask what size drill bit I should use. HAH. I figured it would be 1/4" since that's the diameter of the seal we picked, but I was wrong, he said he'd go with a 3/8". (OK, so I actually bought both; what he recommended ANDD the 1/4" cause I totally didn't believe him.... he was right!  And turns out I didn't need them after all, cause Craig had them in his tool bag, oh well, I'm glad I asked!)

The most HILARIOUS (sarcasm) part of this encounter: When Craig came home from work, I showed him the new lids. He didn't seem as thrilled as I was, so I told him how much they sell for online. His reply was "and what did you pay for those grommets, like .10 cents"
WHAT! YOU KNEW WHAT THESE THINGS WERE CALLED AND DIDN'T TELL ME! Where were you weeks ago when I was searching and searching for them?!
haha.... guess I should have asked him first, huh.


These lids are prefect for any of your parties or backyard BBQ's. Maybe even an outdoor summer wedding, adding paper straws in the wedding colors?! Best part is it keeps those pesky summer bugs out of your drink. They're great for toddlers too. 


Please Note: these lids are not 100% leak proof, when layed on it's side there is a little dribble that comes out of the seal.

If you'd rather purchase these lids instead of making them, you can check them out on Etsy here.

xo

If you follow me on Facebook or Instagram (@kristanlynn) , you already knew about how I made these awesome lids, if you don't, you missed out on knowing how to make them days ago. There are lots of little DIY projects and inspiration photo's I post on there that don't make it to the blog, so be sure to LIKE me on FB to be the first to know what's going on.

******************************************************************************

I'd like to announce a new blog sponsor The Letter 4 +  1. The Letter 4+1 is a charitable company that provides hope & support through uplifting stories and by donating proceeds from inspirational products sold to benefit: childhood diseases (See Love), child abuse prevention (Give Hope), & a unique monthly cause (Create Possibilities).  They sell the cutest shirts, iPhone cases and prints. Go shop and help support those in need. Read about how The Letter 4 + 1 got started here.

******************************************************************************


May 21, 2012

Packaging Handmade Products - The Etsy Shop + Printable DIY Envelope

There's been a lot going on in the shop lately. Changing the way a few things are done, including adding direct checkout so you can pay by credit card without having to use PayPal. I've been building up stock and re-organizing how I store all of that stock.  I've also been finishing up and listing cards that have been just sitting as drafts (like this awesome Mason Jar Thank You or this WINE Birthday Card!), and it feels good. A dozen new cards have been added these past few weeks, and I still have a dozen more that need to be finalized and photographed.

The biggest change I've made (and the reason behind this post, other than a bit of self-promoting... hah) is the way my cards are packaged to ship. I've been really wanting to add more of a personal and handmade touch to my packaging, while cutting down the cost. I know $1 may seem like a lot to pay for the shipping of a card, but truth be told, it costs me more than that. So after playing with a ton of ideas, I've settled on repurposing old Kroger brown bags into mailers to save some money... and some trees. WIN-WIN.


What's inside the package:

I have a checklist for each order which is something like this:


Of course the cards ordered, then:
  • Handwritten note (on recycled cardboard- old cereal boxes- to keep cards from bending in mail)
  • Fun confetti recycled out of paint chips
  • a few fun little extras (I can't giveaway all my secrets ::wink.wink::)
  • Business Card
  • Twine or Stamped kraft sleeve/bag

Where does all that stuff go??


The cards and extra goodies all get put inside a recycled mailer in which I designed and print onto the Kroger bags.


Stamp c/o Baby Jewels 

 
Want to make your own recycled mailers??
 
What you need:
  • Paper grocery bags
  • Scissors & Pen
  • 8.5" x 11" piece of cardstock (to trace)
  • downloadable PDF template from The Etsy Blog
  • Printer w/ ink

Let's get to it:
  1. Cut the seam on the back of the Kroger bag, and then cut out the bottom. You will be left with a flat piece of kraft paper.
  2. Take a piece of 8.5" x 11" piece of card stock and trace it onto the now flat bag. Then cut them out. You should be able to get 4 pieces out of 1 bag (possibly 5 if you can carefully open the bottom flaps)
  3. Stack the new pieces of recycled kraft paper and press, by placing some heavy books on top. This will help flatten them out and keep them from getting jammed up in your printer.
  4. Download this printable template or make your own.
  5. Print your design onto your recycled kraft paper and cut out.
  6. Fold flaps, place your goodies in and tape up. =)

NOTE: You can thank Danielle on the Etsy blog for inspiring me to create new mailers. If you go check out this post written by her back in 2008, I'm sure you'll find inspiration too. If you scroll to the bottom of her post, she provides a link in which you can download a fun mailer which you can print and use.
 
I used the download as a template but re-designed most everything on the front of the envelope to better fit my style. I decided I wanted keep the back of the envelope blank so I could use my pretty stamp, but kept the "thank you" and the "recycle this envelope" on the flap, because they were already perfect.

As far as addressing the envelope, I usually just copy and paste right from the Etsy order to Illustrator and print off each mailer as orders come in ( I HATE MY HANDWRITING! which may be why I'm so obsessed with pretty fonts).


Photo originally from this WIW post.

Craig is always complaining about how long it takes me to get orders out. And I totally know that I could pump them out twice as fast as I actually do, but then I wouldn't be able to add all of these little touches. And it's these little touches that make my customers feel special, which makes me happy. (And to be honest, it really doesn't take all that long!)

I'm not saying you have to go all out and add a million little things to your packaging, because lets be real... your customer is buying from you because they like what you are selling. BUT  just think about how ecstatic they would be with a little surprise in there? A big part of selling handmade is word of mouth. A happy customer might tell their friends about you, but an ecstatic customer will shout your name from the rooftops. We want ecstatic customers, and adding these little touches will surely help you get your customer there. Even if it's just something as simple as a homemade mailer.


What are your favorite way to package your items?? What kind of packaging has been your favorite to receive?


xo


***********************************************
little bird bands
I'd like to introduce a new sponsor Little Bird Bands. It's a shop full of handmade baby accessories. She makes the cutest stuff for littles and takes custom orders! Be sure to check out her FB page too. You can order right from her shop, or contact her on FB to create a custom accessory for your little.

***********************************************

If you feel like I've missed something or need to add anything, please don't hesitate to email me so I can update! Thanks for being you! You all rock my world, daily!

May 2, 2012

Mini Instagram Prints | DIY | make your own mini polaroid prints

I’ve been wanting to buy some of those mini Instagram photo’s that I’ve been seeing everywhere. I searched and searched, and while I found few great sites that were pretty cheap, I just couldn’t press “BUY”. Good thing, because I got over 200 mini prints for $12!

The thing I love about Instagram, is it’s REAL LIFE. A sneak peak inside what is going on at that exact moment… whether it’s how someone is feelings, what they are seeing or doing… you are able to be right there following a long. And it’s is always a pretty journey! Cause Instagram makes everything pretty.

I’ve seen a quite a few cool ideas using the IG mini prints. Like Elsie’s Instagram Wall or turning them into old-school Photo Strips with The College Prespster.

I’ve settled on making a scrapbook filled with snapshot of our daily life, inspirations and projects. Something not so traditional. Here’s a sneak peak of what is in store.

ig

Cute huh?? I really wanted it to look non-traditional… kind of thrown-together”, but still cute. More details in a later post, but know that I am putting all my pretty Washi tape to good use!

Anyways, while I was making my mini IG prints and sharing the goodness on Instagram (go figure), I had a ton of people comment, FB, tweet and email about how they could make them or just state they NEED them now! So to answer most of the questions I received, I’ve thrown together a quick tutorial.

It’s really easy.. I’ve seen Photoshop tutorials out there… and well… Photoshop and I have barely hit first base… which makes me a little insecure around him. So, we’re going to use Picasa… because 1. it’s a FREE download if you don’t have it and 2. it’s way less complicated!!!

ig1


TIP: Now you should have all your IG photo’s on your computer, because we all know how important syncing your phone is… but in case you don’t.. never fear! I recently upgraded to the 4s and then upgraded from my (what now feel like a dinosaur) Dell laptop to a Mac…. so the only IG photo’s I had were from the past few months. Just head to instaport.me, where your will be able to download a zip file full of every IG photo you’ve ever taken!! Easy peasy.

What you need:
Photo Paper (anything semi gloss!)
Printer
Paper Trimmer (this is not necessary, you can use scissors… but using a trimmer makes it so much easier and is totally worth the $$!)

So after you have all your IG photos, here what you’d do:

  • Select the photo’s you’d like to print and click the Collage button
  • You’ll be taken to the Collage screen, in which you would make sure that Contact Sheet is selected.
  • Pick whether you would like a square border, which would make them look like the mini prints you would buy online, or you can choose to make them look like old polaroids.
  • Select your Paper size, make sure the the shadow box is unselected and click CREATE COLLAGE.

You’re ready to print =)

ig2

NOTE: Depending on your photo paper size and how many photo’s you select will vary your mini print size.
I used 8.5 x 11 inch HP Semi Gloss photo paper. Here are the dimensions I got:
12 Photo’s selected. Landscape. Square: 1.75” x 1.75”
9 Photo’s selcted. Portrait. Polaroid: 2” x 1.5” (roughly)
6 Photo’s selected. Landscape. Square: 2.5” x 2.5”
6 Photo’s selected. Landscape. Polaroid: 2.25” x 2.5” (roughly)

ANOTHER TIP: You can definitely use smaller photo paper. I did a few prints on 4 x 6 and they are super cute… super MINI… but super CUTE! Just remember the more photo’s you add, the smaller your prints will be.

ONE MORE TIP: While there is no excuse not to be using IG, as it’s now available on Android, you can use ANY picture for this project. Just crop the pictures into a square and play with the AWESOME (Picnic like) filters Picasa offers now, before placing into the collage. (Secret, I did this to 10 or 11 pics that I just HAD to have in my scrapbook.)

While this is pretty basic, I know there are some people that are not familiar with Picasa, so I found this great in-depth step-by-step photo tutorial done by Finding Nana for you to check out. If you’re at all confused… take a look at her post to get some clarification.

I was able to get a little over 200 mini prints out of 25 sheets of 8.5 x 11 photo paper. Office Depot has their HP semi gloss photo paper half off right now, so for 25 sheets I paid $12! That’s a total steal, because one of the places I checked out to make my mini prints offered 48 prints for $12. WHOA!

Here’s a quick size comparison of the super mini’s, 8 square photo’s printed on 4 x 6 photo paper. Next to a quarter, and then next to the 1.75 “ x 1.75”, just to give you an idea.

ig3

xoxo 

Remember, The $12 doesn’t reflect ink, but depending on your printer/ink prices… I’m estimating at most add maybe $5 –$10. The prints are mini, so in all actuality, it’d be like printing around 10   8 x 10 prints.